

Piercing Aftercare
Our In-Depth Guide Detailing Full Cleaning Instructions, Jewelry Info, and FAQ's

Cleaning Solutions for BODY Piercings
-
We strongly encourage you to use a Sterile Wound Wash Saline Solution for all cleaning routines. Your saline ingredients should list 0.9% sodium chloride, and Purified or Distilled water as the only 2 ingredients. Additives like moisturizers and anti-bacterials should be avoided, as well as similar sounding products like contact lens saline, nasal spray, or eye drops.
-
Mixing your own sea salt solution is no longer a suggested practice from the APP. Mixing your own sea salt solution will commonly result in the product being far too salty and strong, this can over dry the piercing and interfere with healing.
Cleaning Solutions for ORAL Piercings
-
For cleaning the inside of the mouth, we recommend using an Alcohol-free and hydrogen peroxide-free mouthwash.
-
Plain clean water. Bottled or filtered water is preferred. (For rinsing only)
-
Packaged or bottled Sterile Wound Wash Saline Solution. Your saline ingredients should list 0.9% sodium chloride, and Purified or Distilled water as the only 2 ingredients. This is not for internal use but external use only (like cleaning the outside of your lip piercing).
-
Do not use contact solution, eye drops, or nasal rinse products on your piercing.
CLEANING INSTRUCTIONS FOR BODY PIERCINGS
-
WASH your hands thoroughly for 30 seconds using warm water and soap prior to cleaning or touching your piercing for any reason.
-
SPRAY on and around the piercing with Wound Wash Saline solution twice per day, morning and night while healing. Moving or rotating jewelry is not necessary during cleaning/rinsing and may actually irritate the piercing.
-
REMOVE any crusty debris and build up using either a saline soaked Q-tip, or guaze pad. Gently clean so to avoid any additional trauma, and until you’re post or barbell can move freely without obstruction.
-
DRY with clean, disposable products like gauze or sterile paper towel to gently remove any remaining debris. Cloth towels should be avoided as they can harbor bacteria and snag on jewelry, and avoid using dry Q-tips, as fibres can wrap around and snag on jewelry.
What is Normal?
-
Initially: Some bleeding, localized swelling, tenderness, and/or bruising.
-
During Healing: Some discolouration, itching, secretion of a whitish-yellow fluid that will form some crust on the jewelry. The tissue may tighten around the jewelry as it heals.
-
A piercing may seem healed before the healing process is actually complete. This is because this type of wound will heal from the outside to the inside. Although it may feel fine on the outside, the interior could still be fragile. Be patient, and keep the piercing clean throughout the entire healing period.
-
Once Healed: The jewelry may not move freely in the piercing; do not force it. Cleaning your piercings as part of your normal hygiene routine can help them stay clean and avoid having normal, possibly smelly, secretions accumulate.
-
TIP: Piercings, even healed ones, can shrink or close in minutes, even after having been there for years! This varies from person to person; if you like your piercing, keep jewelry in — do not leave it empty.
What To Avoid
-
Avoid cleaning with alcohol, hydrogen peroxide, antibacterial soaps, iodine, or any harsh products, as these can damage cells. Also avoid ointments as they prevent necessary air circulation.
-
Avoid Bactine®, pierced ear care solutions, and other products containing Benzalkonium Chloride (BZK). These can be irritating and are not intended for long-term wound care.
-
Avoid over-cleaning. This can delay your healing and irritate your piercing.
-
Avoid undue trauma such as friction and pressure from clothing, excessive motion of the area, playing with the jewelry, and vigorous cleaning. These activities can cause the formation of unsightly and uncomfortable scar tissue, migration, prolonged healing, and other complications.
-
Avoid all oral contact, rough play, and contact with others’ bodily fluids on or near your piercing during healing.
-
Avoiding things like excessive stress, drug use, excessive caffeine, nicotine and alcohol are suggested as they can prolong the healing process.
-
Avoid submerging the piercing in bodies of water such as lakes, pools, oceans, hot tubs, etc. Or, protect your piercing using a waterproof transparent film dressing. These are available at most pharmacies and are ideal for nipple, navel, and surface piercing placements.
-
Avoid all beauty and personal care products on or around the piercing including cosmetics, lotions, and sprays, etc.
-
Avoid sleeping directly on a healing cartilage piercing can cause irritation, even causing shifts in the piercing’s angle. Placing a travel pillow, on top of your pillow, and then placing your ear in the opening can be helpful to avoid this.
Body Piercing Tips & Tricks
-
Wash your hands prior to touching the piercing; leave the piercing alone except when cleaning.
-
During healing, do not twist, spin, or rotate your jewelry.
-
Exercise and sweating during healing is fine. Avoid activities that could jostle or aggravate the piercing. Keep the piercing protected from bacteria present on gym equipment or exercise mats.
-
Make sure your bedding is washed and changed regularly. Wear clean, comfortable, breathable clothing that protects your piercing while you are sleeping.
-
Showers tend to be safer than taking baths, as bathtubs can harbor bacteria. If you bathe in a tub, clean it well before each use and rinse off your piercing when you get out.
-
For Navel Piercings, you can protect your piercing from excess irritation, physical trauma from activities like sports, or tight clothing with a hard, vented eye patch (sold at pharmacies). To avoid irritation from adhesive/medical tape, you can secure it over your piercing using tights/stockings or using a length of elastic/ace-type bandage around your body.
-
For Nipple Piercings, the support of a tight cotton shirt or sports bra may provide protection and feel comfortable, especially for sleeping.
-
Surfaces like phones, headphones, eyeglasses, etc can be cleaned with an appropriate disinfectant. Items like hats, scarves, headbands, etc should be washed regularly.
-
Use caution when styling your hair and advise your stylist of a new or healing piercing.

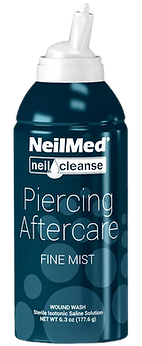

Our trusted piercing aftercare brands include NielMed Fine Mist Wound Wash Spray and Steri-wash Fine Mist Spray. We offer both products in three convenient sizes to suit your individual needs
CLEANING INSTRUCTIONS FOR ORAL PIERCINGS
-
Internal:
-
WASH your hands thoroughly for 30 seconds using warm water and soap prior to cleaning or touching your piercing for any reason.
-
MAINTAIN good oral hygiene practices is important in maintaining a healthy mouth and piercing. You will want to floss, brush and use mouth wash at twice per day. It is vital to not overuse the mouth rinse more than twice.
-
BRUSH gently the jewelry with a clean toothbrush regularly to avoid plaque build up.
-
RINSE with water (bottled or filtered) thoroughly after every time you eat, drink or smoke/vape.
-
External:
-
WASH your hands thoroughly for 30 seconds using warm water and soap prior to cleaning or touching your piercing for any reason.
-
RINSE your piercing thoroughly with warm water in the shower once a day. Then rinse with saline twice a day.
-
REMOVE gently any discharge or crust that may have built up on your jewelry, then dry the area carefully with gauze or clean paper towel.
What is Normal?
-
For the first 3-5 days you may experience swelling, light bleeding, bruising, tenderness, and/or a whitish to yellowish secretion that may form crust on the jewelry.
-
After the first week, you may still continue to experience some minor swelling and secretion.
-
A piercing might seem healed before the healing process is complete. This is because piercings heal from the outside in. Although it feels fine, the tissue remains fragile on the inside. Be patient, and keep cleaning throughout the entire healing period.
-
For lip piercings, it is typical for the jewelry to “nest” slightly into the lip (on the inside) once it is healed.
-
Even healed piercings that you have had for years can shrink or close within a few hours if the jewelry is removed. This varies from person to person; if you like your piercing, keep jewelry in! Do not leave the hole empty for a long period of time.
What To Avoid
-
Do not play with your jewelry. Long term effects include permanent damage to teeth and gums. See the APP’s brochure Oral Piercing Risks and Safety Measures for more information.
-
Avoid undue trauma; excessive talking or playing with the jewelry can cause scar tissue, migration, and other complications.
-
Avoid oral sexual contact including wet kissing or oral sex during healing.
-
Avoid chewing on tobacco, gum, fingernails, pencils, sunglasses, and other foreign objects that could harbor bacteria.
-
Avoid sharing plates, cups, and eating utensils.
-
Avoid using straws. Straw use can increase the risk of swelling and bleeding.
-
Minimize the intake of smoking and vaping (tobacco or cannabis). It increases risks and prolongs healing time.
-
Avoid submerging healing piercings in bodies of water such as lakes, pools, oceans, and even the bathtub.
Eating Habits
-
Take your time with eating until you are used to the piercing and the jewelry is downsized to prevent irritation or prolonged healing.
-
Avoid eating spicy, salty, acidic, or hot temperature foods or beverages for the first two weeks (no specific foods need to be avoided).
-
Cold foods and beverages can be soothing and help reduce swelling.
-
For labret (cheek and lip) piercings: be cautious about opening your mouth too wide as this can result in the jewelry catching on your teeth.
Oral Piercing Tips & Tricks
-
Sleep with your head elevated in the beginning to minimize overnight swelling.
-
Once the swelling has subsided, it is vital to replace the original, longer jewelry with a shorter post or barbell to avoid damage to the teeth and gums.
-
Because this necessary jewelry change often occurs during healing, it should be done by a qualified piercer. This information should have been given to you during the piercing. If not, consult with a professional piercer about your downsize.
-
With clean hands or paper products, be sure to regularly check threaded ends on your jewelry for tightness. For threadless jewelry make sure there is no gap between the post (inside) to the top (outside). In case of a gap, place your index finger and thumb on both sides of the jewelry and press them together. Be sure to check that the gap is closed.
-
Should you decide you no longer want the piercing, simply remove the jewelry or have a professional piercer remove it and continue cleaning the area until the hole closes. In most cases, only a small mark will remain.
HOW TO TREAT MY IRRITATION BUMP
What is a Piercing Bump?
-
Piercing bumps are small lumps that can appear after a piercing.
-
They often occur following cartilage piercings, such as nose or upper ear piercings.
-
Piercing bumps can occur due to poor aftercare, irritation, trauma from knocking or bumping, allergies, inappropriate jewelry, or post-piercing mishandling.
-
Piercing bumps occur when the body’s immune system responds to the wound and initiates the healing response, leading to inflammation.
-
Piercing bumps and keloids are both types of scar tissue that can develop after a skin injury, but have several key differences and severities. If your fresh piercing has formed a soft bump, it would be considered a piercing bump, not a keloid.
Methods to Removing Piercing Bumps
-
Soak the piercing in a saline or saltwater solution 3 times a day.
-
Apply a hot compress with a chamomile tea bag to the bump nightly. The heat helps draw out some of the irritation while chamomile helps reduce inflammation.
Tea Tree Oil
-
Our number 1 Method would be to apply a 100% Pure Tea Tree Oil onto the piercing bump. (We recommend the "Holista" Brand, which can be purchased in any London Drugs or Shoppers Drug Mart)
-
Saturate a Q-Tip or Sterile Gauze, and soak the piercing bump in and around the area before bedtime.
-
Make sure not to rinse the Tea Tree Oil off, but let it sit overnight to fully take effect.
-
You may rinse the area with a Wound Wash Saline Solution in the morning to rid any leftover product.
-
Tea Tree Oil is an astringent, and will help absord and dry out the bump, to allow it to flatten over time. Skin around the bump may flake off and dry throughout application.
-
Be very consistant and apply Tea Tree Oil each and every single night to help rid the bump. If you miss a day or 2, your progress will regress, and the bump may worsen.
-
Maintain your application until the bump is flattened completely. This may take a few days, up to weeks, depending on how large your bump is.
-
Note, do not use "Essential Oil" tea tree oil. This is not the same product and may cause a counter-productive effect.
-
If your piercing bump worsens even with treatment, or begins to harden, it may be best to seek advice from a licensed medical professional.
AFTERCARE FAQ & JEWELRY INFO
When Can I Change My Jewelry?
-
Piercings can all vary in healing durations. We highly recommend keeping your initial jewelry in place until fully healed.
-
If your piercing requires downsizing, its advisable to keep Titanium inserted with your piercers recommend style of jewelry.
-
Changing your own jewelry before being fully healed can result in irritation, excess swelling, infection, migration, rejection, irritation bumps and hypertrophic scarring (keloids), not to mention constant pain.
-
Remember, you'll have the rest of your life to decorate how you'd like, so long as you take care of your piercing until fully healed.
Jewelry Size and Style
-
Jewelry must be inserted with the appropriate amount of length or diameter for your anatomy and for the placement of the piercing.
-
Jewelry that is too tight does not allow room for swelling, proper blood circulation or for the expulsion of normal secretions from the piercing.
-
Ill-fitted jewelry increases the likelihood of swelling, embedding, and other complications if too small, or catching and excessive trauma, if too large
-
Jewelry must be of an appropriate gauge (thickness). Jewelry that is too thin acts like a splinter, resulting in migration or rejection.
-
Labrets are best for most single stud areas, while straight, curved and sometimes circular barbells are most suitable for other placements.
Insertion Options and What Styles to Avoid
-
All of our in-house studded piercings will be pierced with Threadless or Internally Threaded Flat Back Labret posts.
-
Labret posts have a flat disc on the back that lays flat on the skin to avoid any pokes or pricks on surfaces surrounding the area. They are also fit to allow extra length for swelling, and your jewelry should never be fit tightly during your piercing.
-
Certain piercings require both Straight and Curved Barbells for insertion. These Barbells should be secured using Threadless, or Internally Threaded mechanisms to allow for a safe heal, and should be pierced with extra length for initial piercing.
-
Circular Barbells and Captive bead rings may only be used to pierce both Daith and Septum piercings, but should be avoided with most other piercings.
When Should I Downsize My Jewelry?
-
Because of the way in which piercings heal, most new piercings require initial jewelry with a noticeable amount of extra room to allow the tissue to swell.
-
This is crucial to avoid jewelry embedding in the skin. However, when swelling subsides, the jewelry will become noticeably long and should be shortened to avoid snagging, and migrating.
-
Some Oral piercing jewelry should be shortened within the first 1-2 weeks, like tongues and lips, while Piercings like cartilage should be changed after 6-8 weeks.
-
Do not downsize by yourself, especially if inserting unsterile and substandard metals.
Jewelry Material
-
Of the numerous materials available, few have been proven appropriate for wear in fresh body piercings. The American Society for Testing and Materials Standard (ASTM) are the only materials approved to be body safe for piercing.
-
Titanium is a lightweight metal that is ideal for people with concerns about nickel sensitivity, as its nickel content is next to none. ASTM F-136 Implant Grade Titanium is the industry standard for high end material, and is the only material aside from 14kt Gold that our studio trusts and provides.
-
We do not reccomend using G-23 Titanium, Stainless/Surgical Steel, or Sterling Silver to use while your piercing is healing, as these alloys have high traces of nickel content under their surfaces, and may also corrode.
-
Choosing the proper material for healing is the biggest difference between your piercing healing with little to no issue, or leading to multiple complications like infection, migration, regection, irritation, keloid scarring, imbedding and skin growths.